Adding a card to Google Wallet is more than just typing in numbers—it’s a security process called tokenization that makes your phone a secure replacement for your physical plastic. When you add your credit or debit cards to Google Wallet the right way, you unlock maximum security and ensure flawless contactless payments.
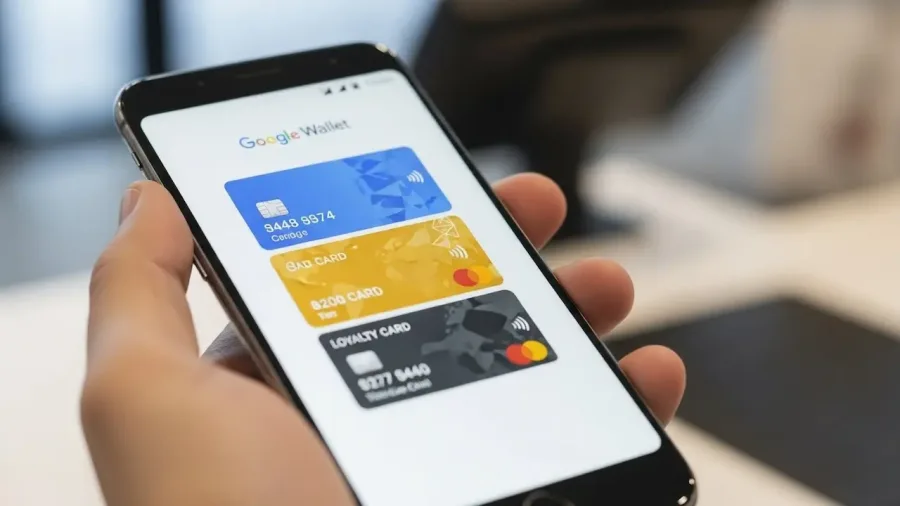
How to add credit and debit cards to Google Wallet the right way (image: Gowavesapp)
This comprehensive guide walks you through the essential pre-checks, the best methods for adding your cards, and crucial security tips to ensure a seamless experience.
Phase 1: pre-launch checklist (device and card requirements)
Before even opening the app, ensure your device and card meet the necessary security and compatibility standards.
1. Checking card and bank compatibility
Not every card issued worldwide is eligible for Google Wallet.
Bank Support: The most critical step is ensuring your specific bank and card type (Visa, Mastercard, Debit, Credit) are supported. Banks have the final say on whether a card can be tokenized.
Action: Contact your bank’s digital payments support or check Google’s official list of supported institutions for your country.
Card Status: Ensure the card is active, not expired, and not flagged for fraud or international restrictions by your bank.
2. Verify device security and NFC
Google Wallet imposes strict security requirements that your device must meet to function.
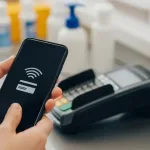
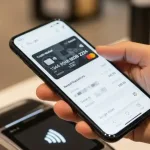
NFC Activation:NFC (Near Field Communication) is essential. Go to Settings > Connected Devices > Connection Preferences and ensure NFC is toggled ON.
Screen Lock: You must have a secure screen lock enabled (PIN, pattern, password, or biometric). Google Wallet will not allow tap-to-pay without this.
Play Protect Certification: Your Android device must be Play Protect certified. This means your phone must not be rooted, running an unauthorized custom ROM, or have an unlocked bootloader.
Verification: Check your certification status in the Google Play Store app: Profile icon > Settings > About > Play Protect certification. If it shows “Device is not certified,” you cannot use Google Wallet.
OS Requirement: Ensure your phone is running Android 7.0 or higher.
Phase 2: Step-by-Step guide to adding your card
There are two primary ways to add a card. Using your bank’s app often has a higher success rate for verification.
3. Method A: adding the card via the Google Wallet app
This is the standard and simplest method.
Open Wallet: Launch the Google Wallet app.
Start Process: Tap the “Add to Wallet” button (often a $\text{+}$ icon at the bottom).
Use your phone’s camera to scan the card for speed.
Crucial Accuracy Check: If entering manually, double-check the Card Number, Expiration Date, and CVV code.
Billing Address Match: Ensure the billing address you enter exactly matches the address your bank has on file for that card.
Read and Accept: Review the Issuer Terms and Conditions (provided by your bank) and tap Accept.
4. Method B: the professional way (Adding via your Bank’s app)
Many banks now offer a direct integration that bypasses some common Google Wallet verification issues.
Open Bank App: Open your mobile banking app (e.g., Chase, Wells Fargo, Itaú, Nubank).
Find Option: Navigate to your Cards or Settings section within the app.
Tap to Add: Look for a button or link that says “Add to Google Wallet,”“Add to G Pay,” or “Digital Wallets.”
Instant Tokenization: Following this path often instantly verifies and tokenizes the card, eliminating the need for manual code entry.
5. The essential final step: bank verification (Tokenization)
Regardless of the method used, the bank must approve the final token. This is where most errors occur.
Verification Options: Google Wallet will prompt you to choose a verification method, provided by your bank:
SMS/Text: Bank sends a one-time code to your registered mobile number.
Email: Bank sends a one-time code to your registered email address.
Bank App: Verification is completed by simply opening your bank’s mobile app.
Phone Call: Requires a direct call to the bank’s automated line.
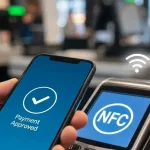
Code Entry: Enter the code provided by your bank into the Google Wallet app. Once verified, a blue checkmark confirms the card is ready for “Tap-to-pay.”
Phase 3: security and management tips
After the card is added, maintain security and maximize efficiency.
6. Essential security tips for cardholders
Biometrics First: Always use your fingerprint or face recognition instead of a PIN when making purchases, as it is faster and more secure.
Review Transactions: Set a routine to check your transaction history in the Google Wallet app and your bank’s app regularly to catch unauthorized use early.
Protect Your Device: If your phone is lost or stolen, use Find My Device immediately to lock or remotely wipe the device. This revokes the payment tokens and protects your financial data.
Virtual Card Numbers: Remember that Google Wallet uses a virtual account number (token) for transactions, meaning your actual card number is never shared with the merchant.
7. Making the most of Google Wallet features
Set Default Card: Drag your preferred payment card to the front of the stack in the app; this will be the card charged automatically when you tap to pay.
Organize Non-Payments: Google Wallet is an all-in-one app. Don’t forget to add:
Loyalty Cards: Scan membership barcodes for quick access.
Transit Passes: Use it for compatible public transit systems.
Event Tickets: Store flight, train, or concert tickets.
By diligently following this step-by-step process, especially focusing on accurate data entry and successful bank verification, you ensure your credit and debit cards are added to Google Wallet the right way, guaranteeing a secure and reliable mobile payment experience.